Showing posts with label Circle Time. Show all posts

Thursday, February 16, 2017

100(+) Acts of Kindness

This year, our class has been working towards the completion of 100 Act of Kindness in honor of Martin Luther King, Jr.   We began this project on MLK Day with hopes of reaching our goal by the 100th Day of School. With Valentine's Day occurring around the same time, what better time of year to complete this challenge?  We invited our entire school community - parents, grandparents, neighbors, to participate with us.  The children eagerly brought their notes of kindness to school where we collected them in a special place.  Each week, we read the notes, admiring and appreciating the kindnesses that were shown.  We documented each act of kindness with a heart on a 100 Board Chart.  It shouldn't come as any surprise, but we surpassed our goal, and came in with 114 acts of kindness!
Once the notes were read, documented, and counted, we were sure to include them for our classroom's Kindness Wreath.  All morning, the children helped to tie on ribbons.  In doing so, some  bits of the grapevine wreath broke off, and a hidden message appeared in their pieces:


May it serve as a reminder to us all!

Thursday, September 29, 2016

Apple Sequencing

The children have been so successful with the following sequencing activity.  The lesson was shown at circle time, and then placed at table for the children to complete.  These types of lessons typically remain where they are until everyone who would like to complete the activity has had a chance to do so.  Usually, this means the lesson stays at its place for a couple of weeks.
We have been enjoying other apple themed activities in the classroom since the beginning of school in early September, so I wanted to be sure this lesson was presented as another apple-themed option in the language area.  Not only has it provided opportunities for practice using scissors and glue, but it also has been wonderful to see and hear how the children are able to articulate their reasonings for the sequencing.
Here, the materials are set up at a table.  First, children color and cut the page.  Then, they are to place the apples in sequence, gluing them on the folded, purple paper.  


What delight to see the children concentrating for long periods of time to complete this activity.  They have been very proud of their work - Some eager to bring it home and share with their families, others wanting to share it at circle time to show their friends!

Thursday, September 24, 2015

Peace Day Art and Song

International Peace Day was celebrated globally last Monday.  On this day each year, our classroom celebrates by creating a collaborative piece of art.  Once completed, these pieces remind us that each of us has an important role and we can each be a peacemaker.  Here is a series of photos showing the process of our collaborative art for this year's Peace Day:


"Light a Candle for Peace"
by Shelley Murley

Light a candle for peace,
Light a candle for love,
Light a candle that shines
All the way around the world.

Light a candle for me,
Light a candle for you,
That our wish for world peace
May one day come true.

Sing peace around the world,
Sing peace around the world!

Listen to this song we learned HERE

Thursday, September 17, 2015

Self-Portraits

We began our self-portrait lesson with a word-study and talked about the definitions of ‘self’ and ‘portrait.’  Some conclusions made by the children after this discussion:
“It means when an artist makes a picture of themselves.”
“It can be with paint or drawing.”
“It can be with clay.”

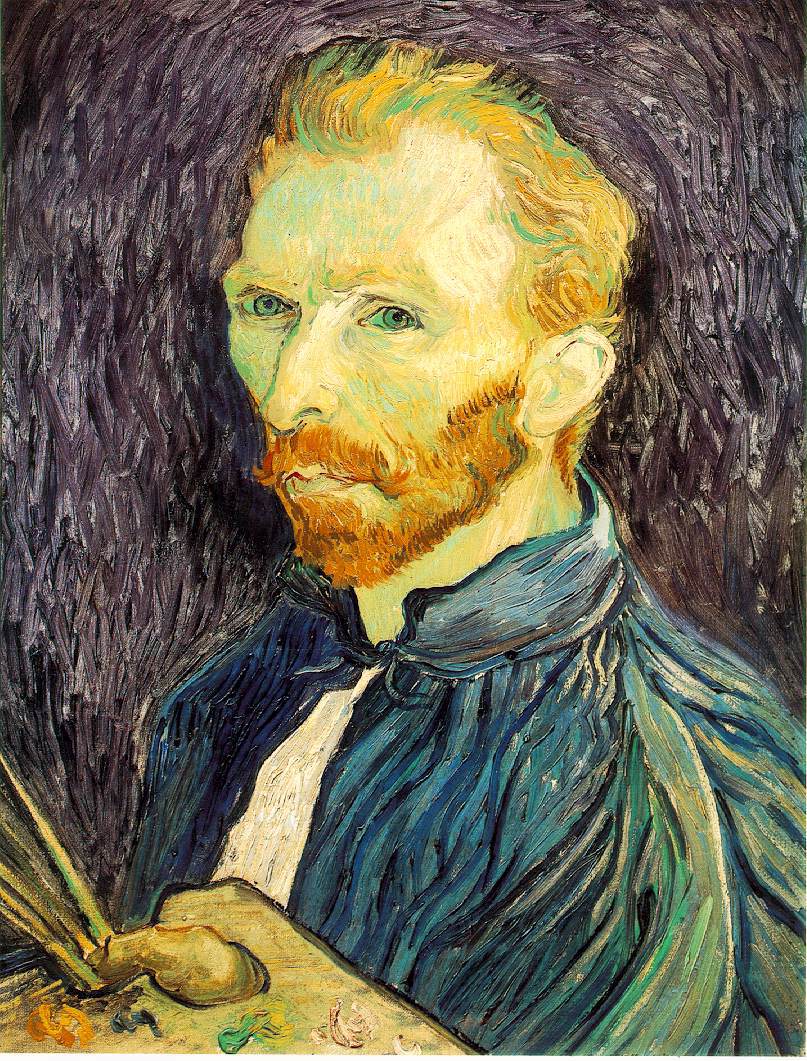
Next, we looked at two examples of famous artists’ self portraits and discussed the details:
Vincent Van Gogh
Frieda Kahlo  
The children noticed facial features, hair color, jewelry, and that these portraits included only the face, neck, and shoulders.


Then, the students were introduced to the materials and shown the steps to create their own self-portraits.  Using a mirror for reference, the children worked with a quiet intensity to include details of their own unique features in their drawings.

A mirror, felt tip pen, and paper were the only materials necessary. 
  I had asked our Assistant teachers to write down any comments the children made during their portrait making process to have a source of documentation.  We noticed, however, a quiet contemplation from the children as  they completed their self-portraits.  They thoughtfully peered in the mirror, noticed the details of their own images, and carefully added them to their drawings. Here are a few examples:


These portraits remind as that we can celebrate each other’s uniqueness while being active members of a community in our collaborative classroom.

Thursday, August 6, 2015

Gearing Up

While I am thankful for the opportunities my family had during the six months we were in Russia for my husband's Fulbright teaching scholarship, I am also thrilled to be back home and back in the classroom that I missed so much.  Finally, I get to act on countless ideas I have had brewing in my mind during so many months away!
Glad to be back!  My daughter took this picture when she came with me to school for the first time since our return at the end of June.   
During my time away, I had the opportunity to check in on classroom happenings via Montessori Compass, which my school uses for record keeping and sharing information with parents.  Not only was I able to keep apprised of my students' progress throughout the year, but I also kept connected through viewing the daily photographs posted for each student.  With an 'outside eye,' I was able to see the classroom from a different perspective, an experience I value very much.  Nonetheless, through viewing the photos from this perspective, I also noticed the main rug in our classroom was wearing out and looking a bit tired.  So, the first order of business upon my return:

Our new rug (along with some new shelving for the bells).  Of course one thing leads to another - the new rug and shelves led to updating the calendar and morning message areas used during circle time.  Next, tape will be added for the Walking the Line activity.
Our previous rug was bright and beautiful with many colors.  While I loved its lively colors, I wanted to go with a neutral tone this time around.  It was my intention to bring out the beauty of the Montessori materials and let them 'stand on their own.'  The rug has given the room a new feel and I think I have succeeded in bringing the eye to directly to the materials.  Naturally, a new rug in the central part of the classroom called for a new rug in the math area:

When I ordered this rug, a picture and description indicated it to be the 'Nines' rug.   I thought, "How perfect is that for the math area?!"  Well, not so much - somehow the image was reversed and they are not the 'nines' as shown in the picture online, but a reversed image.  I am still loving the look and feel of the rug - my instinct is to make a lesson looking at the rug with a mirror and finding the nines…  
Over the summer, I also ordered a beautiful poster portrait of Maria Montessori.  Last year, the children in my class learned a special song about her and I always wanted a proper portrait on display.  Now, we have one:
The Peace area in our classroom - the perfect place of honor for Maria Montessori!
"Within the child lies the fate of the future."   
Since the classroom is now adorned with the new rugs and portrait, I thought this might be an ideal time to update the bulletin boards in the hallway as well.  I have always admired the natural tones of classroom spaces inspired by the Reggio Emilia approach and decided our bulletin boards would be a fun place to experiment with this.

One of two boards in the hallway leading to our cubby space.  I used burlap and twine along with the black and white Moroccan-themed border (which I LOVE!).  The small, wooden clothespins are an effective and easy way to display the children's artwork and projects.  I can hardly wait to see boards these filled up! :-)
Next up, planning and organizing the shelves by curriculum area - an endeavor which will undoubtedly take up the rest of my classroom time between now and the beginning of school.  Stay tuned for updates as they come along and thanks for stopping by - it's great to be back!

Tuesday, October 7, 2014

Autumn Leaves are Falling Down

Autumn leaves are falling down, falling down, falling down,
Autumn leaves are falling down,
Red, yellow, orange, and brown!

The children were introduced to new art activity to go along with this short song.  They have enjoyed this particular variation in their choices of art activities.  I showed the lesson to the children at circle time and then set it up at a table as a stationary art lesson:

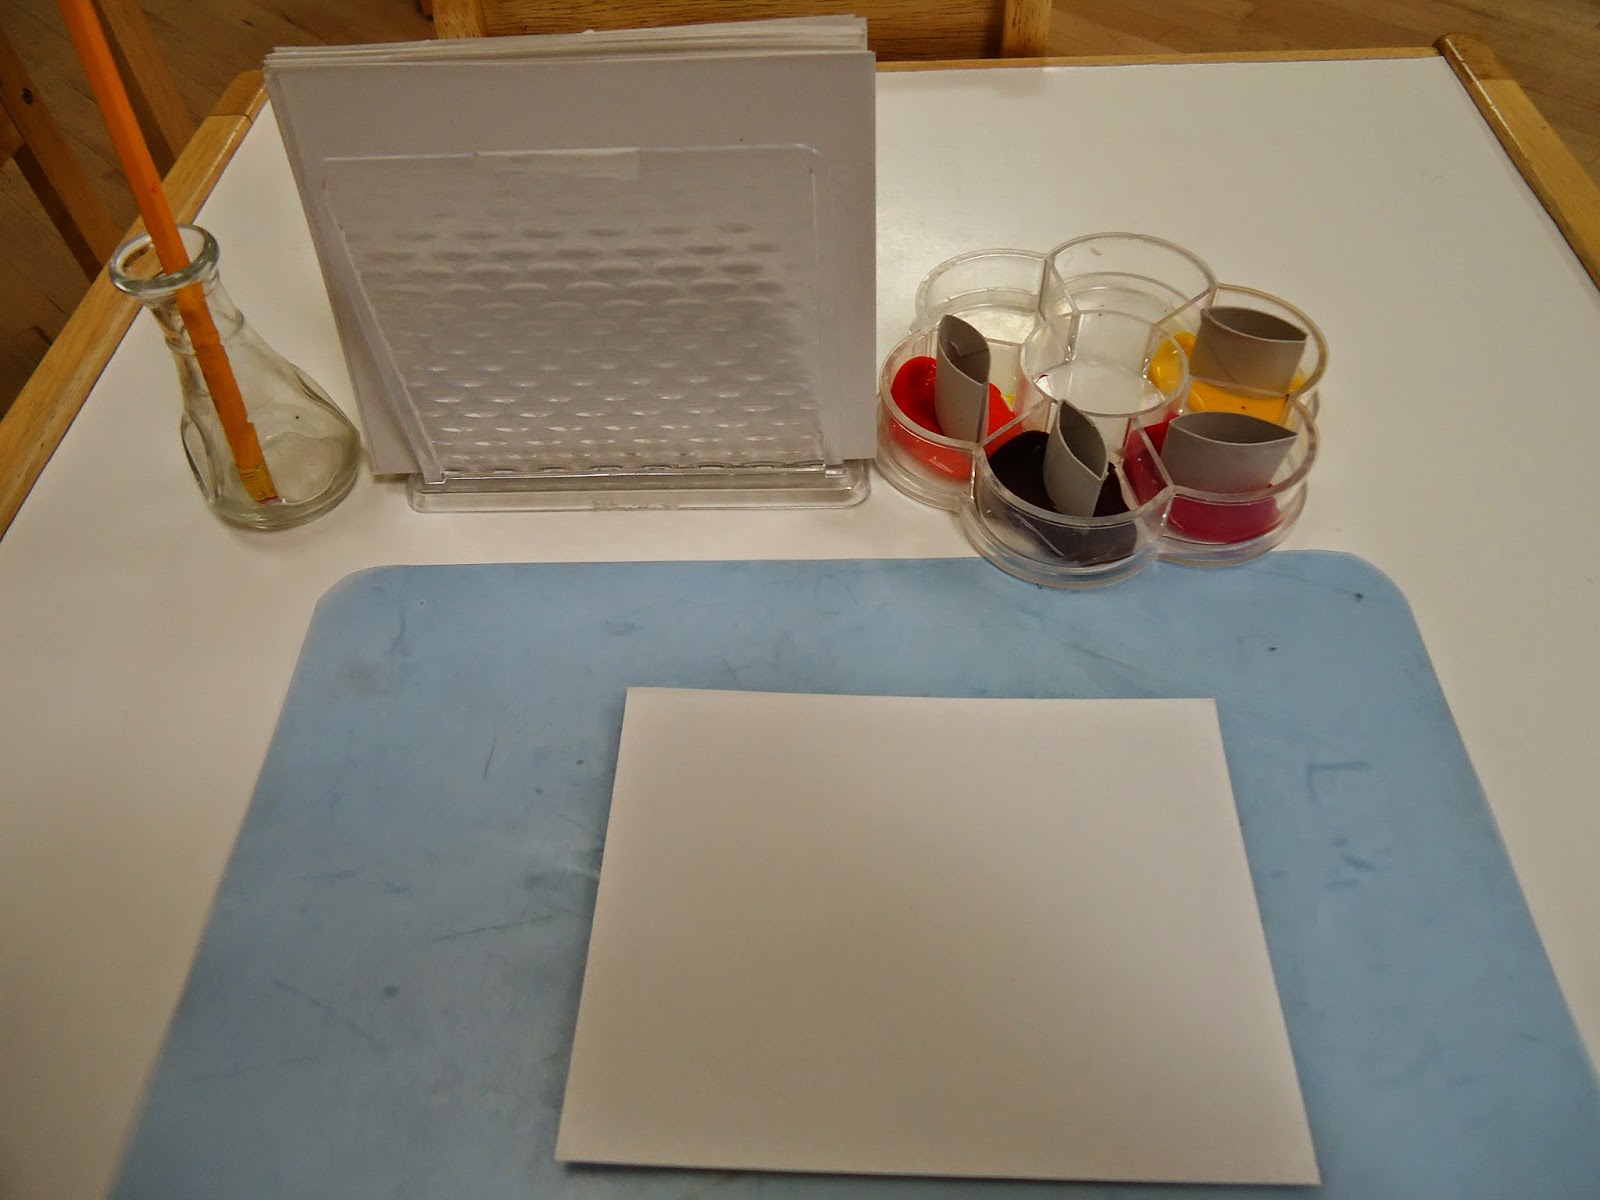
Pencil for name writing; white paper; tray with orange, brown, red, and yellow paint; each color has a 'leaf' stamp which is simply the cardboard tube from a toilet paper roll! 

We love to reuse things! :-)

The result is quite seasonal and the children are loving the process.

Tuesday, September 30, 2014

Peace Day

Last week, our class began working on a collaborative art piece in honor of International Peace Day (September 21st).  For many of our students, this is a new topic and certainly an abstract idea to begin comprehending.  One of the most important concepts we try to incorporate is the idea that peace begins with each of us and how we can work together in our own classroom to help make a more peaceful world.  Our circle time discussions have been guided by the following two books:


We discussed how the dove is a symbol of peace and the children looked for doves in our classroom.  We have a couple of Picasso prints, a few collaborative art projects from previous years (HERE as well), and numerous other places in our classroom with this special symbol.  It was meant to be that the collaborative art project for this year's class turned out the way it did:

"Peace is Filling the World with Love"

A close up of the dove - We did not plan this, but noticed that the space left over once all the children had placed their handprint inside the heart resembled the outline of a dove!

Tuesday, May 20, 2014

Patterning with Stamps

This has been a lesson has been actively used since it was introduced late last week.  It is a an engaging patterning activity which promotes pre-reading, literacy, language, and math concepts.  The koala and kangaroo pictures are intended to go along with our unit of study for Australia.  Many of the children have been creating stories while making their patterns, associating their knowledge from the Aboriginal stories we have been reading together.  Here is the lesson on a language shelf:

Far left - strips of paper with eight sections; tray with stamps, pencil, stamp pad; mat underneath with two pattern cards.

The materials set up at a table with an ABB pattern card.  The other pattern card is for  an AB pattern.

Completed strip with ABB pattern.
As with other activities in the classroom, the child replaces all of the materials used in the lesson and brings it back to its place on the shelf, readying it for use by the next child who wishes to use it.

Wednesday, April 30, 2014

Australian Aboriginal Dot Painting

Since our return from last week's Spring Break, we have been continuing our continent studies and learning about Australia.  One activity the children have been introduced to is an Australian Aboriginal art lesson.  Prior to having this lesson available on the art shelf, we looked at illustrations depicting the art of dot painting.  We have been enjoying the stories and illustrations from this book in particular:


Aboriginal Dot Painting art activity on the shelf:
Basket of various Aboriginal outlines (available HERE); cotton swabs; tray with paints and pencil (for name writing).
The work in progress (this is my youngest son who was eager to give it a try while I was setting up the classroom over spring break!).
A completed Aboriginal Dot Art project.

Wednesday, April 2, 2014

Reading Sentences: Animals of South America

Here is a simple reading lesson for readers and pre-readers alike.  Readers may sound out words and identify sight words while pre-readers can use the pictures for matching objects.


I had introduced the cards during circle time over the course of a few days.  Once all the cards were introduced, the animals were placed in a basket so that children may match them to the cards:


Children may also wish to copy the sentences for handwriting practice or make and illustrate their own booklets.  I have a feeling these animal replicas will be irresistible for most of the children! :-)

Tuesday, March 11, 2014

Flags of South America

While learning about flags of South American countries, we have also been honing phonemic awareness skills with the following lesson.  A big thank you goes to Every Star is Different for providing a link to download these great cards!  Prior to placing the activity on the shelf, I had taken a few days to introduce the cards/flags at circle time.  For example, one morning we would look at a few cards and the following day a few more were introduced.  We did this for several days until all the cards were  familiar.  Then, the activity was placed on the shelf:

Flags of South America with numbers for syllable counting.

The child identifies the flag, says the country's name, and claps the corresponding syllables.

Lastly, a small stone is placed on the corresponding number to match the number of syllables (claps).

Monday, February 10, 2014

The Olympic Torch

I wanted to mark the event of this year's Winter Olympics in Sochi, Russia with a special activity in the classroom.  Thanks to Trillium Montessori's wonderful resources, I was able to introduce the children to this topic using the Olympic cards found here.  We talked about the Olympic torch as a symbol of the games and the following craft was introduced (another super idea from Trillium Montessori!):

Olympic Torch materials:  brown paper with torch outline, black paper, pencil, scissors, pieces of tissue paper, glue, brush.  (I purposefully chose to use my Russian dish set to house the materials… )  :-)

After cutting out the torch outline, pieces of the tissue paper are glued to make flames.

This activity has certainly generated lots of excitement about the Olympics!

Wednesday, January 22, 2014

Saying Goodbye to Our Fish

One of the reasons Montessori classrooms include the care pets is to provide children opportunities to tend to other, living beings.  Taking care of animals widens children's perspectives which highlight a greater, interconnected universe.  Montessori used the term Cosmic Education to bring to light the child's awareness of the interconnectedness of the world around him.  This idea manifested itself quite naturally in our classroom with the recent passing of our beloved Blue Fish, one of our classroom pets.

Blue Fish had been in declining health for quite some time and the children took notice of this early on. Each day we would check on our fish, determining if he needed anything, feeding him, etc.  On several occasions we thought he had already passed, only to be surprised when he started swimming again.  Needless to say, the topic of his death became a natural point of conversation among the children, guided by the teachers in a gentle way.  When the morning came and it was clear our Blue Fish had died, the children were well prepared and ready for the news.

I had been quietly ruminating about the situation as we'd never had this come up before (Blue Fish was older than most of the children in the classroom!).  I should have known that it would be the children who would lead the way and take care of things the way they were meant to be.

The early morning children were already in the classroom when we sadly discovered Blue Fish at the bottom of the bowl, having clearly passed on.  The children took in the situation and before I knew what they were doing, began bringing items from our Peace Table and placing them next to Blue Fish's bowl.  The peace rose, a beautiful feather, a collection of rocks with the words 'peace,' 'love,' and 'joy,' a small pinecone, a tiny teddy bear…  "These will help to make him feel peaceful," they said.  Then, without pause, another child said, "I will write a gratitude for the fish."  And with that, the children began planning a circle time to say good bye to our fish.  I quietly stepped to the side, and listened as the children decided we should bury him outside - there was a great concern that he would be stepped on if we buried him.  They discussed some more and concluded we should write his name on a rock and place it on the spot where he is  buried.

Throughout the morning, each child received the news with sincere sadness, yet proceed to show their love in their own ways.  We collected the gratitudes and thoughts about our fish in a basket and read them at circle time:

Dear Blue Fish,  I am thankful for you.  I hope you will be ok.  I will miss you.

Dear Blue Fish,  I will miss you.  Thank you for being a part of our classroom.


Dear Blue Fish,  I am sorry that you died.  Thanks for being our friend.


Dear Blue Fish,  I am thankful for you.  You are a best friend.  I hope you are peaceful.


Dear Fish, You lived a long life.  I am sad you died.  I will miss you.


I am thankful for the fish.  I love him.  


Dear Blue Fish,  I liked feeding you.  I liked your color.  I liked how you swam.


Dear Fish,  I will miss you.  You were a good fish. 


Dear Blue Fish,  Thank you for being a friend in our classroom for so long.  I will miss you when you go to Heaven.


Dear Fishy,  I love you.  Sorry that you were sick.  I will miss you.


I am sorry that you died.  I am thankful for your swimming.  I loved you.    

Dear Fish,  I will miss you and I love you.  All of us will miss you.  And I love you Blue Fish, forever. 


And with that, we took our beloved fish outside and found a spot under a tree to bury him.

So many lessons were learned from this experience - lessons that can't be described in an album or even  classified as 'presented,' 'working,' or 'mastered.'  These are the lessons of of a Cosmic Education, those in which we see the delicate balance of the universe.  Thank you, children for showing the way.


Wednesday, January 15, 2014

Sand Map: Antarctica

This lesson is similar to the Africa sand map, but uses a colored paper plate instead of paper:

Sand map of Antarctica.
I also made a series of printed labels which students place on the plate prior to applying glue and sand.  Using the colored plate gives a clear visual impression of how the continent is surrounded by ocean - a concept we have been discussing as we learn about Antarctica and its place on the Earth.

The activity is set up at stationary table  (rather than on the shelf). 

Wednesday, January 8, 2014

How to Draw a Penguin

While this idea is not novel in teaching children drawing techniques, it is new to our classroom.  In keeping with our recent introduction to Antarctica and learning more about the continent, I thought this would be the perfect time to introduce a sequential drawing lesson - and I must admit that the children's renditions are quite adorable!

As with most art lessons, I first demonstrated the activity during circle time.  Afterwards, the materials were set up on the art shelf:

Squares of white paper; step-by-step 'How to Draw a Penguin' booklet; jar with pencil,  orange and black markers.
A closer look at the pages in the booklet:


Ok, so how cute are these?


I love the sense of pride and accomplishment that is expressed having completed a drawing.  Providing students simple, step-by-step instructions encourages them to notice details while enjoying the process.  One student shared with me, "Thank you for making this booklet Ms. Sasha - if you didn't make it, I wouldn't have been able to draw a penguin."  I think I'll be making more booklets such as this and perhaps adding a writing component to future drawing works.  The possibilities are endless!