Thursday, May 17, 2012

Folding Papers: Part 2

A couple of months ago, the students in my class were working on an art activity involving folding paper squares and gluing them - you can read more about it in THIS POST. 

Recently, as a variation and added challenge for the kids, I decided to add a step to the process which is to cut small slits diagonally into the fold: 

Cutting small slits on the diagonal of the fold...

...folding the small cuts back and gluing onto paper...

...and resulting in some eye-catching designs!
While my students have enjoyed the challenge of this additional step, I have observed how they work with determination and complete the activity with a sense of satisfaction.

Tuesday, May 15, 2012

Gratitude Jar

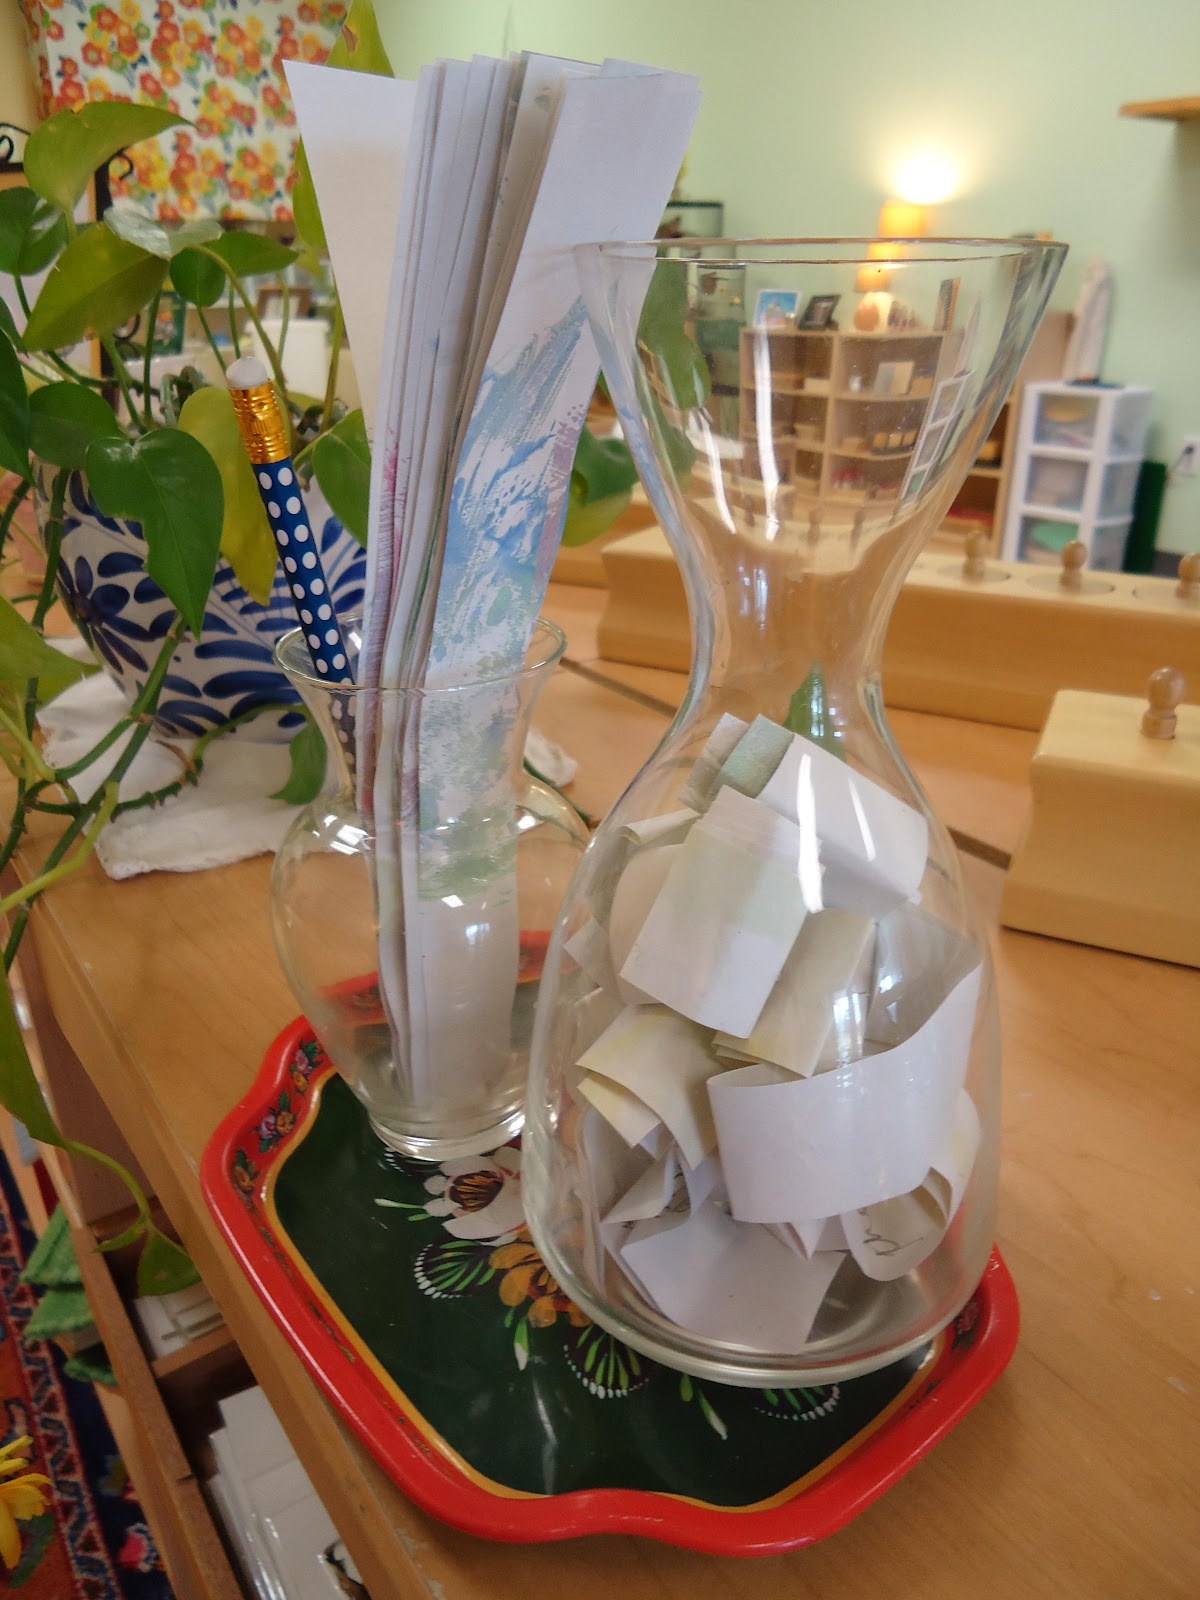
Classroom Gratitude Jar
Small vase with writing strips and pencil and a jar for collecting written gratitudes.

I keep forgetting to share this...  A couple of months ago, after reading about it at Living Montessori Now, we started a classroom Gratitude Jar.  It has fast become a treasured occasion when all of the 'gratitude papers' have been used up and placed in the jar!  I showed the children how to take one strip of paper and the pencil to a teacher when they want to write down their gratitude.  The child tells the teacher what they are thankful for and the teacher writes down the child's words.  I especially appreciate how this simple activity is also a wonderful way to model writing!  (The writers in the classroom can of course write their own gratidtudes...)  Then, the child takes their paper, writes their name, rolls it up, drops it in the jar, and replaces the pencil back in the jar with paper strips. Once all the papers have been used, we gather at circle time to read them one at a time.  These are just a few examples of recent gratitudes:

"I am thankful for my Mom and Dad." 
"I am thankful for the works on the shelves."
"I feel grateful for my friends."
"I feel thankful for peace."
"I am thankful for my toy loader truck."
"I am thankful for the 100 Chain."
"I am thankful for my teachers."
"I feel grateful that I have a school like this to come to."
"I am thankful for the birds."

Needless the say, it has been heartwarming to hear the children talking about feeling thankful and having "an attitude of gratitude." 

And by the way, now I've found the perfect way to use up the papers, paintings, etc. that end up on the drying rack with no name - they make beautiful writing strips for our Gratitude Jar! :)

Saturday, May 12, 2012

Muffins, too!

In addition to these photos showing our regular activities from our morning work, we also finished up wrapping our Mother's Day gifts, baked muffins, and  assembled fruit kabobs.  Later in the week, we hosted our annual Muffins for Moms event with much success! 
Exploring geometry with the Constructive Triangles Box C.
Sandpaper Numbers - rubbing over with crayon on paper to make a booklet of numbers.
Memory Game of Numbers with items from around the classroom. 
Water work with a dropper.
Trinomial Cube extension work - building the cube outside the box.
Decimal System Cards
Building Puzzle Words with the Small Moveable Alphabet.
Writing practice in the cornmeal tray - the kids LOVE this!
Clipping flowers (barrettes) onto ribbon - great fine motor practice and development of concentration and coordination!
Static Subtraction with Golden Beads.
Vocabulary Enrichment - Types of Birds.
Matching Spring cards.

Refining visual discrimination and fine motor development with a Solid Cylinder Block.
Exciting math work with the chains, squares, and cubes.
Matching picture/word with animals from the Farm activity.
A snail with the Pink Tower and Brown Stair!
Initial sounds and reading work.
The children are very much enjoying coloring the Map of the World and painting the oceans!


Thursday, May 10, 2012

Mother's Day Gifts

We've been busy working on these lovely gifts...  Moms of of my students, you may want to skip this post if you want your gift to be a surprise!!!  I wanted to share this idea, however, because if there is anyone out there in need of a last minute gift idea, this one is great.  So simple and beautiful!


____________________________________________________________________________________


Materials:
Sculpey (we used plain white)
rolling pin
toothpick (for writing initials in the clay)
straw (for making a hole for stringing)
leaves (we used cedar greens)
string
wooden beads

First, roll out the Sculpey, then press the leaves into the clay.
Roll it with the rolling pin...
Carefully peel away the leaves.  They can be used again.
Use a small bowl or glass to cut out a circle shape...
...and the straw to make a small hole.
We used the toothpick to write initials on the back before baking in the oven according to package directions.  After they cooled, we added some string and beads...

Gorgeous necklaces for moms on Mother's Day!

Tuesday, May 8, 2012

Progressive Exercises

Can you imagine the response of a parent when a Montessori teacher enthusiastically shares, "Today, your child completed the the Stereognostic Progressive Exercise!"  "The what?!" a parent most likely thinks.  In an effort to quell this uncertainty, here is a brief explanation of this wonderful Sensorial lesson.

The Progressive Exercise is a unique lesson in the Sensorial area of the Montessori classroom which heightens awareness of the child's sense of touch.  This lessons aids the child's development of the haptic, or "blind man's" sense.  The student is invited to feel with his fingertips one of four different objects in pairs and sort each one into sections of a tray or small dishes.  Then, he closes his eyes or covers them with a blindfold and proceeds to feel the remaining items from the pairs, one at time.  After one object is felt, the child compares it to the others and pairs the items by touch alone.

Montessori teachers are forever thinking of ways to vary lessons and materials without losing sight of the lesson's intended purpose.  The Progressive Exercise is a fun way to include seasonal or thematic items and integrate classroom curriculum areas.  For example, shells would be ideal items to use in this lesson if the class is studying oceans.  Other objects can include beads, different types of uncooked pasta, buttons, seeds, etc.  I enjoy putting together different items for this lesson and change them periodically - the kids also look forward to these variations!  This month, I placed different types of flowers (beads and buttons) to go along with a Spring theme:

This is the lesson as it appears on the shelf.  All of the items are in one, central dish.
One item from each pair is slowly felt.  During the initial presentation, the teacher demonstrates how to hold the object in one hand and feel it with the fingertips of the other hand.  This is completed as slowly as possible, emphasizing how to feel the differences of each object.
Here, one object from each pair has been felt and placed into a dish.  Now, the student closes their eyes (or, as is the case in my classroom, puts on the ever-popular blindfold!) and takes one item from the central dish.  They feel it in their hand and then feel for the matching one in one of the dishes.  When a match is made, the child puts both objects together in the same dish, all while using only the sense of touch.
Lesson completed.
Such a simple lesson, yet full of critical opportunities for the child!  I often wonder where else, other than a Montessori classroom, can a child practice and refine their sense of touch with such care and enthusiasm?!  For me, it is one of the " One Thousand Reasons to Love Montessori!"

Saturday, May 5, 2012

I'm Still Standing...

The classroom was incredibly busy this week - don't get me wrong, this is a wonderful thing...  But I had to check to see if I was "still standing!" ;)  On top of the encouraging progress of the class and its members, we were also busy greeting guests (prospective families and students), observing an intriguing science experiment, practicing our carpentry skills with our outdoor hammering, all while getting started with Mother's Day festivities!   Here is only a glimpse into our world from this week - sometimes so much is happening at once that it is impossible to take pictures of it all!
Recently, I placed many small, hand-written labels around the classroom such as the one seen here in the art gallery.  This has prompted a mini-writing explosion as quite a few kids have taken to...
...practicing writing the words on chalkboards (and paper, too).
 Addition Strip Board work.
Geography work with the US Puzzle Map.
"This is three o'clock!"  Learning about telling time.
New month = new Calendar work for May.
Pink Tower and Brown Stair extension work.
Matching the Number Rods to the Number Cards.  This picture shows how the child has set up some mats (in the background) and is taking one card out at a time.  After reading the number card, he then goes to the shelf to retrieve the corresponding Number Rod.  Lastly, he brings the rod to the mats and matches the card to the rod.  This is a wonderful distance, memory, and movement activity!
A sneak peak at our Mother's Day gifts - this is only one step of many...  I will share more next week!
Yoga with cards.
Coloring a map of the world and painting the oceans.
An exercise with the Addition Strip Board - making number combinations of a chosen number (here, it is 12).
Continent Folders:  Asia
Associating number symbol with quantity and the concept of zero with the Spindle Boxes.
Dynamic Addition with Golden Beads.
Pink Tower/Brown Stair exploration.
Working with the Binomial Cube.
Geography- Land, Air, and Water:  Sorting photos.